1. Introduction
This project consists of an audio cassette wall shelf that can be 3d printed and only requires standard screws to assemble. Also, it can be scaled horizontally and vertically for any amount of cassettes. It is one of my first 3d printed objects so the model is somewhat simple.There is FreeCAD model which use an internal spreadsheet for some parameters like the number of cassettes per individual 3d element for customization.
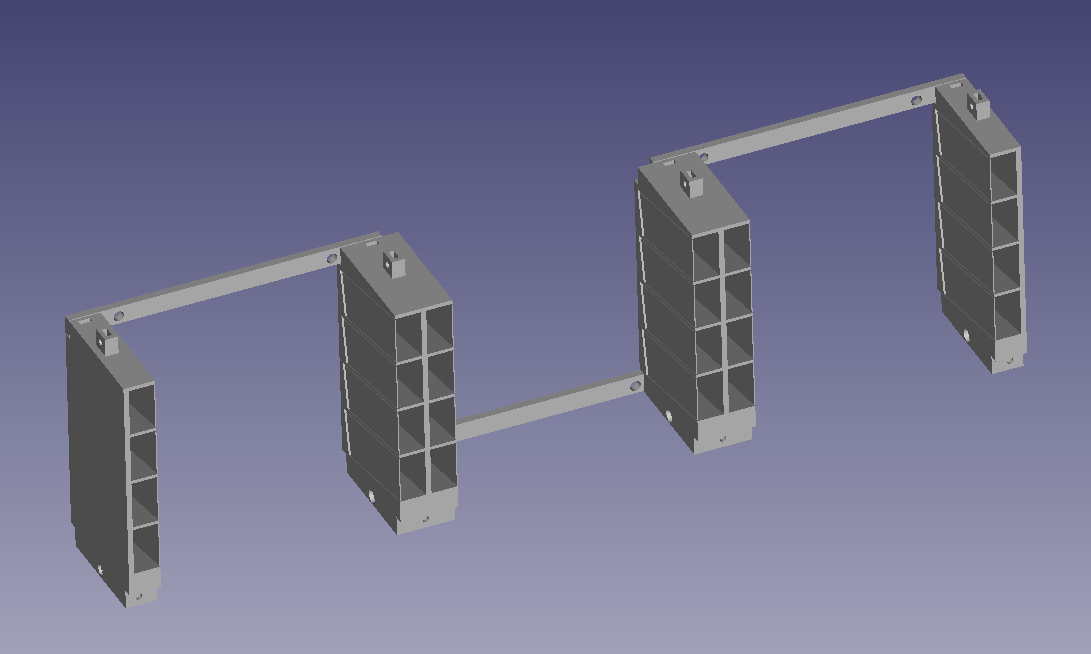
Here is image of the final shelf in a 3 by 4 cassette configuration:
The model is licensed under CC BY-NC-SA 4.0


 .
.
2. FreeCAD model
You can download the FreeCAD model (1369 kB) if you want to modify it.The spreadsheet can be used to modify some parameters but be aware that not all elements are parameterized and ony some parameters will actually change the dimensions of the model.
Here is a list of the most important parameters:
- screwsize: This is the diameter of the screws used to connect all pieces. By default a M2x5 screw is used.
- nutsize: This is the diameter of the screw nut.
- nutsize extra space: This adds some additional space in the socket for the nut. Too little space makes it are to insert the nut, too much space will make the nut turn which makes it hard to tighten the screws.
- number of cassettes: This is the number of cassettes per individual element. Depending on the available printing space you can use a larger number to reduce the material overhead.
3. Required materials
You need a 3D printer using regular material like PLA.To construct the final shelf, you need M2x5 screws. You can use screws with a different diameter if you change some variables in the model's spreadsheat.
You can use as many rows as you want and for each row you need:
- 1 left piece
- 1 right piece
- any number of middle pieces (preferable an even number)
- 2 horizontal bar outer2mid
- horizontal bar mid2mid matching the number of middle pieces (minus 1)
The left, mid, and right piece contain a small vertical layer of support which must be removed after printing.
4. Base elements
Left piece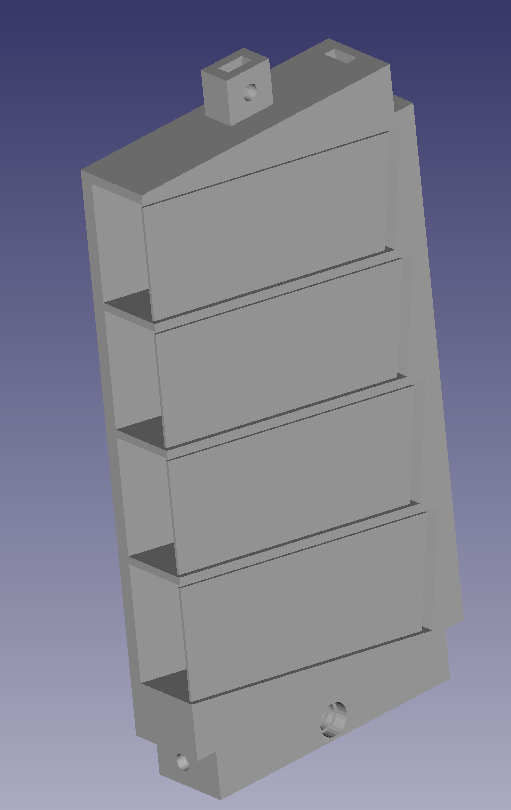
|
cassette_shelf/left-piece-4cass.stl (106 kB) |
Middle piece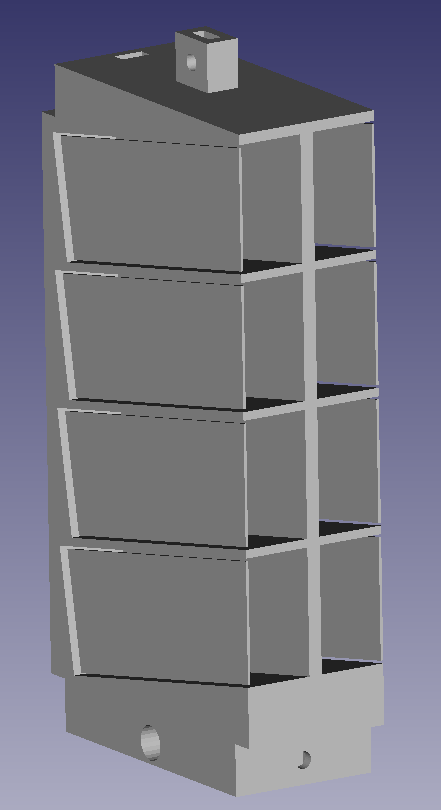
|
cassette_shelf/mid-piece-4cass.stl (122 kB) |
Right piece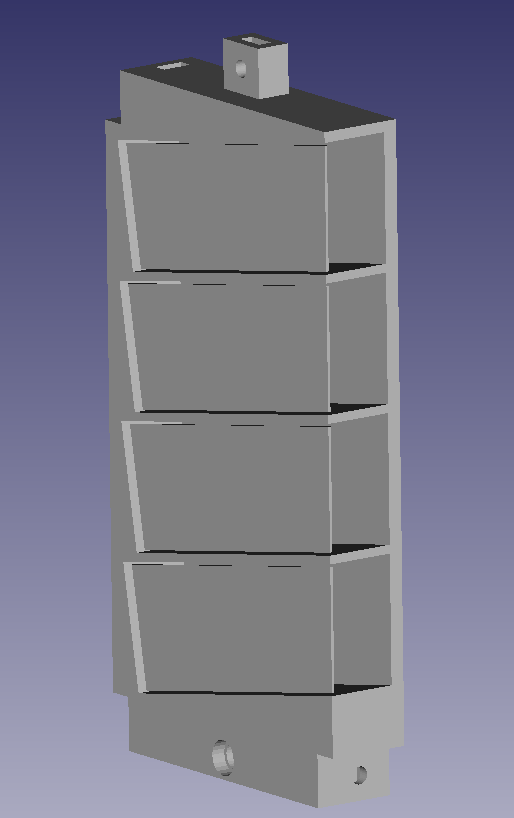
|
cassette_shelf/right-piece-4cass.stl (106 kB) |
Horizontal bar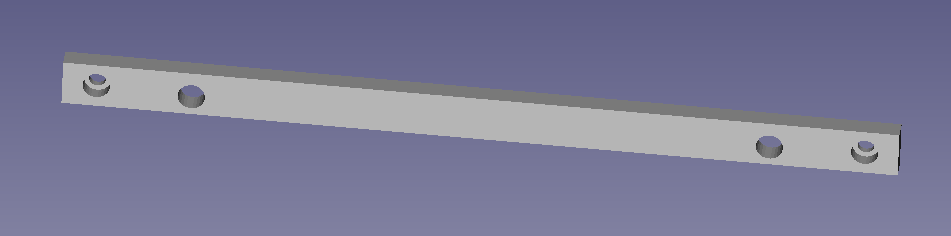
|
Outer-to-Middle: cassette_shelf/horizontal-bar-outer2mid.stl (31 kB) Middle-to-Middle: cassette_shelf/horizontal-bar-mid2mid.stl (31 kB) |
| Wall attachment segments | cassette_shelf/mid-wall-attachment.stl (29 kB) |
5. Assembly
I recommend the following assembly order:- Vertically connect all left pieces by inserting a nut into the top socket. Also insert nuts into the back slots for the horizontal bars. The left piece only requires the top or bottom nut.
- Then tighten the elements with the screw by the side.
- Do the same the for right pieces and middle pieces. The right pieces also uses only one nut for the horizontal bars, while the middle piece uses both nuts.
- Now use the horizontal bars of the correct length to connect the left, middle, and right pieces. The bar for the outer2mid connection is slightly smaller than the bar between middle elements. The bars have two holes on each side. The outer hole connects to the actual pieces, while the inner hole is used to be attached to a wall. Keep in mind that the inner wall holes are slightly off center on purpose for additional plastic material to carry the weight. Also, the outer holes have additional space for the screw head.
- When finished, you can attach the complete shelf to the wall by using the holes in the horizontal bars.
If you want, you can print additional horizontal bars for the front for increased stability but this is not required.
You can also print additional wall attachment segments which connect to the upper socket, but this is optionally too, as the horizontal bars can carry the weigth too.
6. Recommended print settings
I recommend the following printing settings:- for all elements except the horizontal bars:
- 3 layers for the wall and top/bottom.
- 10-15% infill.
- base support is recommended but not required.
- model support is not recommended. If used, I recommend to remove the separate vertical support planes in the model before printing.
- for the horizontal bars:
- 4 layers and 10-15% infill. Depending on the final size of the shelf and how many bars you want to use for wall attachment, you can also use 100% infill for additional stability as it makes not much difference in use of material.
- support is not required.